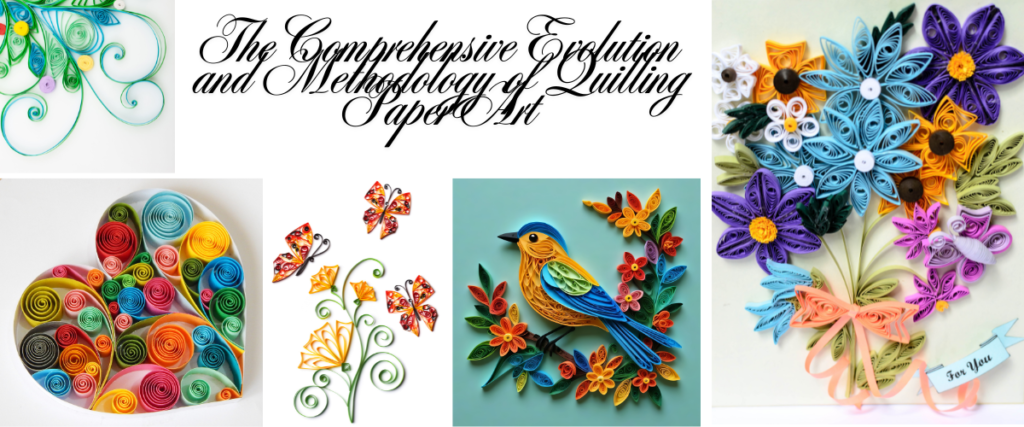
The art of quilling, historically referred to as paper filigree, paper scrolling, or mosaic, represents a sophisticated intersection of material science, artistic expression, and historical upcycling.1 It is a form of handmade art that involves the meticulous manipulation of thin strips of paper—rolling, coiling, curling, and twisting—which are then shaped and bonded with adhesives to form intricate three-dimensional designs.4 While the contemporary revival of quilling has transformed it into a medium for high-end typography, wearable jewellery, and architectural miniatures, its roots are deeply embedded in religious devotion and socio-economic adaptation across multiple centuries.4 The name itself is a historical artifact, derived from the goose feather quills originally used by nuns and monks to roll the paper strips.1 This article provides an exhaustive analysis of quilling’s historical trajectory, its technical foundations, the engineering of specialised tools, and the emerging trends defining the medium in the mid-2020s.
The Historiography of Paper Filigree and Global Origins
The origins of quilling are characterised by academic debate, with several competing theories suggesting that the practice of coiling materials predates the modern era of paper production.1 Some researchers posit that the roots of the craft can be traced back to Ancient Egypt, where similar coiling techniques may have been applied to materials available at the time.1 Other historians argue for an origin in Ancient China, correlating with the invention of paper following the Han Dynasty, while a third perspective suggests that 4th-century Greece utilised similar coiling methods in metal filigree, wrapping silver and gold threads around columns and vases in combination with gemstones.1 Regardless of its earliest inception, by 300–400 AD, these techniques were well-established as a means of decorating religious items and luxury goods.1
The Renaissance and the Art of the Impoverished Church
During the Renaissance, quilling gained significant prominence in Europe, particularly within the Catholic Church at the height of its power.7 This era heralded a new standard for religious art, where no expense was spared for the finest craftsmen and materials in the production of papal apartments and prestigious cathedrals.7 However, not every local church was privy to such massive expenditures. Impoverished monasteries and smaller convents throughout France, Italy, and England sought more modest means of reverence.6 In an early form of intentional upcycling, monks and nuns repurposed the gilded edges trimmed from Bibles and other religious texts.4 These paper trimmings, which featured a thin layer of gold or silver, were coiled around goose quills to form spirals that were then moulded into various shapes and fitted into panels or crucifixes.4
The designs were executed with such precision that it was frequently impossible for observers to distinguish between the quilled paper and real gold or silver pieces carved by professional blacksmiths.6 These paper filigree creations, known as paperolles in some regions, were used to decorate reliquaries housing the bones of saints.7 As quilling became a respected technique, it began to incorporate other materials, including wax portraits, hand-painted miniatures, solid gold, and jewels.7 Antique quillwork from the 17th century, such as those dedicated to St. Nicholas, serves as a primary example of this period’s craftsmanship, and high-quality surviving works can fetch thousands of dollars at auction today.7
The Georgian and Regency Eras: The Leisure Class
By the 18th and early 19th centuries, quilling transitioned from a religious necessity to a fashionable pastime for the “gentlewomen” of the European nobility and ruling classes.1 In England, during the Georgian and Regency periods, quilling was taught in boarding schools as a necessary skill for young women of quality, alongside embroidery and other domestic arts.1 It was considered an ideal hobby because it was perceived as a delicate activity that did not demand too much from the mind or the supposedly “fragile disposition” of a lady.4
Prominent figures, including Princess Elizabeth (daughter of George III), were known practitioners, and the craft was used to embellish an array of domestic items, including tea caddies, work baskets, coat of arms, and storage boxes.4 The market for quilling during this era supported cabinet makers and crafters who provided small wooden boxes and furniture frames specifically designed with recessed panels to be decorated with quilled art.7 Authors such as Jane Austen and the Brontë sisters were associated with the craft, highlighting its cultural pervasiveness among the educated classes of the time.6
The Colonial Era and Industrial Decline
Quilling spread to the American colonies with European settlers, where it remained a common sight in affluent homes during the Colonial period.5 Women would gather to practice the art together, creating decorative panels that mirrored the popular ironwork of the day.5 However, the advent of the post-industrial age led to the mass production of decorative items, causing a significant decline in the popularity of many handmade crafts, including paper filigree.1 While attempts were made to revive the craft in the late 1880s by William Bemrose—a writer on woodcarving who owned a printing firm—the practice largely faded into obscurity until the late 20th and early 21st centuries, when it was rediscovered by a new generation of crafters and professional artists.1
| Era | Primary Practitioners | Typical Materials | Key Applications |
| Renaissance | Nuns and Monks | Gilded Bible edge trimmings | Reliquaries, holy images, crucifixes |
| Georgian Era | Nobility, Princess Elizabeth | High-quality paper strips, wood frames | Tea caddies, card tables, toolboxes |
| Regency Era | Schoolgirls, “Ladies of Quality” | Colored paper, gold leaf | Work baskets, cabinets, and wine vases |
| Colonial Era | American Settlers | Imported and domestic paper | Home decor, marriage keepsakes |
| 21st Century | Professional Artists, Hobbyists | Acid-free GSM paper, digital patterns | Typography, 3D sculptures, jewellery |
1
Material Science and the Modern Quilling Toolkit
The transition of quilling from a traditional hobby to a professional art form has been facilitated by an understanding of the physical properties of paper and the engineering of specialised tools designed to manipulate it. Modern quilling has moved far beyond the use of goose feathers and toothpicks, though these items still serve as functional alternatives for those working without dedicated equipment.1
Paper Properties: GSM, Width, and Texture
The quality and durability of a quilling project are primarily determined by the paper’s weight, measured in grams per square meter (GSM), its width, and its texture.11 Professional quilling strips are typically manufactured with a GSM between 100 and 120, which provides the necessary sturdiness for the paper to hold its shape after being coiled and pinched.11 Lower GSM paper, such as standard printer paper (roughly 75-80 GSM), is prone to becoming “slushy” when glue is applied and lacks the rigidity required for advanced techniques.11 Conversely, higher GSM papers are essential for “on-edge” quilling, where the paper must support its own weight without the aid of internal coils.4
The width of the paper strip dictates the depth of the finished design and its suitability for specific applications.10
- 3mm (1/8 inch): This is the industry standard for intricate cards, framed art, and lightweight jewellery.8
- 5mm: A preferred width for beginners, as it is easier to handle and provides more surface area for adhesion when mounting pieces to a background.11
- 10mm to 12mm (1/2 inch): These wider strips are commonly used for creating fringed flowers, 3D miniatures, and structural “walls” in shadowbox designs.10
- Specialty Textures: Modern markets offer dual-toned strips (different colours on each side), metallic-edged strips, ombre patterns, and shimmer effects that mimic the gilded edges of historical Renaissance work.11
The Engineering of Rolling Tools
The most fundamental piece of equipment is the coiling tool, which comes in two primary configurations: the slotted tool and the needle tool.8
- The Slotted Quilling Tool: This tool features a metal head with a microscopic slit or “slot” in the centre. The end of a paper strip is inserted into the slot, which holds it firmly as the handle is rotated to create a coil.11 While this is a “must-have” for beginners due to its ease of use, the slot leaves a small crimp or visible fold in the centre of the coil, which some advanced artists find undesirable.8
- The Needle Quilling Tool: This tool consists of a thin, un-slotted needle. The artist must wrap the paper strip patiently around the needle without the aid of a slot.11 This produces a smooth, “perfect centre” without any crimp, making it the preferred choice for professional-grade scrolls and high-end jewellery.8
- The B.O.S.S. (Battery Operated Spinning Slotted) Tool: Designed to increase efficiency and reduce physical strain, this tool uses a motor to rotate the slot at high speeds, coiling paper in seconds.12 It is particularly beneficial for artists working on large-scale projects or those with hand strain or finger soreness.17
Auxiliary Equipment for Precision and Speed
As quillers progress toward more complex designs, the toolkit expands to include specialised moulding and measuring devices.
- Circle Sizer and Template Boards: These boards feature various circular holes of fixed diameters. A freshly rolled coil is placed into a hole and allowed to expand until it fills the space, ensuring that multiple elements—such as the petals of a flower—are identical in size.11
- Curling Coach: This is a flat, transparent tool that supports the quilling needle. It assists in creating large, tight coils by keeping the paper flat and preventing the “tornado effect,” where the centre of the coil telescopes outward.11
- Border Buddy: A set of tiered plastic shapes (squares, circles, triangles) used to wrap paper strips into large, hollow frames or borders without an internal spiral.11
- Crimper: A tool that passes paper strips through gears to create a corrugated or “crimped” texture before coiling, adding a unique visual dimension to the design.11
- Quilling Comb: A tool with metal prongs, similar to a hair pick, used to weave paper strips into alternating loops. This is a primary tool for the “combing” technique used in floral and avian designs.11
Foundational Geometry and Coiling Techniques
The art of quilling is built upon a library of basic shapes, almost all of which begin as a simple coil.9 The transition from a circular coil to a complex geometric form is achieved through a combination of tension management and controlled pinching.18
The Core Shapes: Coils and Scrolls
- Tight Coil: This is created by rolling a paper strip firmly around the tool and applying a small amount of glue to the end before releasing it. Tight coils are dense, structural, and often serve as the centres of flowers or the components of 3D models.18
- Loose Coil: A strip is rolled tightly but then removed from the tool and placed on a surface (or in a template board) to expand. Once it has reached the desired size, the end is glued. The internal spacing of the loose coil determines the “softness” of the final pinched shape.18
- Scrolls: Unlike coils, scrolls are not glued at the ends. They remain open and can be rolled into various configurations, such as “S” scrolls (ends rolled in opposite directions), “V” scrolls (folded in half and ends rolled outward), or “C” scrolls (ends rolled toward each other).15
Geometric Taxonomy and Pinching Mechanics
The transformation of a loose coil into a specific shape is determined by where and how hard the artist pinches the paper.9
- Teardrop: Pinching one side of a loose coil creates a teardrop shape. If the pointed end is then curved around a tool or finger, it becomes a “Curved Teardrop” or “Paisley”.18
- Marquise (Eye Shape): Pinching two opposite sides of a loose coil simultaneously creates a marquise. This is a foundational shape for leaves and petals.9
- Square and Diamond: By creating a marquise, rotating it 90 degrees, and pinching two more points, the artist forms a square or diamond. The final proportions are determined by the distance between the pinches.18
- Half Circle: Pinching two corners of a loose coil while keeping the bottom flat results in a half circle. Curving the flat edge can further transform this into a “Half Moon” or “Crescent”.9
- Triangle: Starting with a teardrop and flattening the rounded end creates a triangle. Additional pinches can create specialised variations like the “Arrowhead”.23
- Holly Leaf: This is widely considered the most difficult foundational shape. It involves using tweezers to grip portions of a marquise and pinching secondary peaks to create the characteristic jagged edge of a holly leaf.23
| Shape | Starting Point | Manipulation Method | Common Usage |
| Tight Coil | Strip | Glue immediately after rolling | Flower centres, eyes, 3D bases |
| Loose Coil | Strip | Allow to expand before gluing | The base for all pinched shapes |
| Teardrop | Loose Coil | Pinch one side firmly | Leaves, petals, raindrops |
| Marquise | Loose Coil | Pinch two opposite sides | Eye shapes, structural filler |
| Square | Marquise | Rotate 90° and pinch again | Mosaics, geometric patterns |
| Heart | Teardrop | Indent the rounded end | Romantic cards, Valentine’s |
| Star | Pentagon | Pinch five flat sides | Christmas decor, sky motifs |
9
Advanced Architectures: Husking, Combing, and Fringing
As practitioners advance beyond basic coils, they utilise techniques that allow for greater scale, structural complexity, and airy, delicate textures.22
The Husking Technique: Precision with Pins
Husking is a method of shaping paper around a series of pins rather than coiling it around a central tool.22 This process is typically performed on a “Husking Board”—a cork or grid board that allows for precise pin placement. 17
- The Anchor and Loop Process: An anchor pin (Pin #1) is placed at the base of the design. A paper strip is looped around subsequent pins and brought back to the anchor after each loop.22
- Straight Husking: Pins are arranged in a line to create long, wheat-ear-like structures often used for stalks of grass or long leaves.22
- Fan-Shaped Husking: Pins are arranged in a circular or semi-circular pattern to create light, fluttery flower petals or butterfly wings.22
- Durability: Unlike coils, husked pieces are often hollow. To ensure they remain stable, artists frequently wrap a “rim” strip around the entire finished shape two or three times to reinforce the structure.22
Combining and Wheatear Techniques
- Combing: This technique uses a quilling comb (or a hair comb) to create a series of identical, perfectly spaced loops. By weaving the paper strip between the prongs and gluing it back to the starting point, the artist can create complex, repetitive patterns that are difficult to achieve by hand.11
- Wheatear Coils: These are loose, closed coils where each individual loop is fixed in place with a dot of glue. This prevents the centre of the coil from falling out and allows for the creation of elongated, textured shapes like corn ears or feathers.22 Rainbow effects can be achieved by using multiple colours of paper strips aligned and glued together before starting the loops.22
The Fringing Method for Floral Realism
Fringing involves using a wider paper strip (typically 10mm or more) and making a series of narrow, perpendicular cuts along its edge without cutting all the way through.11
- Assembly: Once the strip is fringed, it is rolled into a tight coil. The “fringe” is then gently fanned out with a finger or tool to create a soft, multi-dimensional flower.10
- Fringing Scissors: While this can be done by hand, specialised fringing scissors with multiple blades can create five or more identical cuts simultaneously, drastically reducing the time required for large projects.11
On-Edge Quilling and Modern Typography
Perhaps the most significant trend in professional quilling in the 21st century is “on-edge” quilling, also known as paper typography or linework.29 This technique involves gluing the narrow edge of a paper strip directly to a background substrate, creating a crisp, three-dimensional outline rather than a coiled shape.29
Typography and Linework Construction
Professional artists like Yulia Brodskaya have redefined quilling through intricate on-edge portraits and typographic pieces that can take upwards of 45 hours to complete.5
- Scoring and Folding: To create the sharp angles required for letters or geometric patterns, the paper must be carefully scored and folded. Professional kits often include detailed templates that show exactly where to score, fold, and curve each strip.30
- Adhesion Challenges: On-edge work requires a very steady hand and a high-GSM paper (often 120-160 GSM) to maintain vertical stability.4 Glue is applied with surgical precision—sometimes using a syringe or a needle-tip applicator—to the edge of the paper to ensure a clean finish without visible residue on the background.29
- Background Selection: Because on-edge work is more structurally demanding, artists typically mount these designs on heavy mat board or foam core to prevent the substrate from warping under the weight of the paper walls and the moisture of the adhesive.32
3D Sculptural Quilling and Miniature Construction
The evolution of quilling from 2D relief art to 3D standalone sculptures represents the zenith of the craft’s modern application.4 This transition is made possible by the development of “cup coils” and “doming” techniques.12
Moulding and Doming Mechanics
The creation of a 3D object, such as a miniature vase or a doll’s head, begins with an exceptionally large and tight coil.22
- Preparation: Multiple strips (sometimes seven or more) are glued end-to-end to create a single, very long strip.22
- Moulding: After rolling the strip into a large, tight coil, the artist gently pushes the centre outward using a finger, a wooden dowel, or a 3D dome mould.12 This transforms the flat disc into a hollow, three-dimensional cup or dome.12
- Resination: Because the paper tension alone is not enough to maintain the 3D shape, the interior of the dome must be coated with a generous layer of PVA glue. Once dry, this glue acts as a clear, structural resin that prevents the dome from collapsing back into a flat coil.12
Miniatures and Standalone Pieces
Advanced quillers combine domes, fringed flowers, and traditional coils to build complex sculptures.
- Miniature Dolls: These are constructed by stacking domes for the body and head, with quilled scrolls for hair and fringed strips for clothing.36
- Flower Pots: A project might involve a purple and white 3D pot, a toothpick “stem” coated in fringed green paper for leaves, and small yellow fringed flowers mounted on top.22
- Trinkets: Modern artists have used quilling to create 3D models of everyday objects, such as miniature television sets, gift boxes, and even an “Eye of Sauron” for educational history projects.6
Professional Finishing: Sealants and Preservation
Because quilled art is made of paper, it is naturally susceptible to humidity, dust, and structural deformation. For functional quilling, such as jewellery, bookmarks, or Christmas ornaments, the application of a chemical sealant is essential to provide durability and water resistance.13
Comparative Analysis of Sealants and Glazes
Professional artists choose sealants based on the desired finish (matte vs. glossy) and the degree of hardness required.13
| Product Name | Finish Type | Drying Consistency | Primary Advantage |
| PPA (Perfect Paper Adhesive) Matte | Flat Matte | Thick, non-penetrating | Preserves the natural look of the paper |
| PPA (Perfect Paper Adhesive) Gloss | High Gloss | Thick, surface layer | Adds vibrance and a plastic-like shine |
| Ceramcoat Liquid Matte Sealant | Semi-Matte | Thin, liquid | Soaks deep into tight rolls for maximum stiffness |
| Crystal Coat Glaze | 3D Glossy | Very thick, hard | Best for jewellery and “inset” pendant designs |
| Diamond Glaze / 3D Lacquer | Clear Gloss | Hard, dimensional | Mimics resin for a polished, professional look |
13
The Multistage Sealing Protocol
To achieve a professional, water-resistant finish that does not result in a “soggy” or deformed piece, a multistage application process is recommended.13
- The Stiffening Coat: A thin, liquid sealant (like Ceramcoat) is applied first. Its low viscosity allows it to penetrate the innermost layers of a coil, sealing the design from the inside out.13
- The Waterproofing Layer: Once the stiffening coat is dry, a layer of PPA or a similar sealer is painted on one side. After that side is dry, the piece is flipped, and the process is repeated.13
- The Final Glaze: For items that will be handled frequently, such as earrings, a final topcoat of Crystal Coat Glaze provides a hard, 3D finish that protects the paper from surface moisture and oils.13
- Curing: In humid climates, quilled jewellery should dry for at least 48 hours to ensure the sealant has reached its maximum hardness.13 While these treatments make items “water-resistant,” they are not “waterproof.” They can survive a rainstorm, but should be removed before swimming or bathing.13
Contemporary Trends and the 2025 Outlook
As quilling has re-entered the mainstream, it has found a lucrative niche in the luxury wedding industry and the custom home decor market.38
The Wedding Stationery Evolution
For the 2025 wedding season, couples are increasingly moving away from flat, digital invitations in favour of “sensory richness” and “handcrafted poetry”.39
- “Castlecore” and Medieval Romance: This trend incorporates ornate fonts and textural papers with quilled floral embellishments in rich navy, emerald, and burgundy tones.42
- Sustainable Luxury: The use of plantable paper—seed-embedded cardstock that can be planted after the event—combined with quilled details, appeals to eco-conscious couples.39
- Keepsake Shadowboxes: It has become popular for couples to have their wedding invitations professionally framed in shadowboxes, with quilled flowers and motifs added to create a permanent piece of wall art.38
- “Cherry-coded” Details: A rising trend for 2025 involves vibrant red quilled cherry motifs on place cards and “hen party” invitations, adding a playful, youthful touch to traditional stationery.42
Home Decor and Lifestyle Integration
In interior design, quilling is being utilised for large-scale “statement pieces” such as quilled quote wall art and 3D floral arrangements for room decoration.35 Wearable quilled art, including owl pendants and sunflower necklaces, has also gained popularity as a unique, eco-friendly alternative to traditional jewellery.35 These pieces often combine traditional quilling shapes with other media, such as metallic watercolour backgrounds or fabric signage.32
Educational Utility, Safety, and Troubleshooting
Quilling remains a highly accessible craft for children and beginners, provided that proper safety protocols and technical adjustments are followed.6
Quilling as a Pedagogical Tool
Educators use quilling to teach fine motor skills, patience, and history.6 For younger students, the use of wider paper strips (6mm to 10mm) is recommended, as they are easier to handle and less prone to unravelling.46
- Tool Modification: A child-friendly quilling tool can be made by inserting a slotted toothpick into the barrel of a discarded pen, providing a large, comfortable handle for small hands.46
- Adhesive Safety: For preschoolers, it is more effective to spread a thin layer of glue on the background substrate and let the child place the shapes onto it, rather than having the child apply glue directly to the delicate paper.46
Safety Protocols and Environmental Awareness
Art materials must be chosen with care, especially when working with children or in home studios.45
- Labelling: Look for the ACMI “AP” (Approved Product) seal, which certifies that the material is non-toxic. Avoid products with the “CL” (Caution Label) seal in child-focused environments.47
- Chemical Hazards: Avoid aerosol sprays containing CFCs or solvent-based glues like rubber cement.45 PVA (white glue) is the safest and most effective adhesive for quilling.47
- Physical Safety: When using sharp tools like cutting blades or awls, always direct the tool away from the body. Provide close adult supervision for any child using quilling needles or pins.45
Expert Solutions to Common Challenges
Even professional quillers face common technical issues such as tension inconsistency and glue seepage.20
- The “Tornado” Effect: This occurs when a coil is pulled off the tool too quickly, causing the centre to telescope. To fix this, artists use a curling coach or their fingernail to hold the barrel of the tool tip while sliding the coil off.11
- Glue Seepage: Excessive glue can ruin the clean lines of a design. Experts keep a damp cloth and a small paintbrush handy to wipe away extra glue before it dries. If the glue has already dried, it can sometimes be removed using cuticle nippers or a craft knife.19
- Uneven Expansion: If coils are not expanding evenly, it may be due to the paper being “stuck” to itself from finger oils. Gently manipulating the coil with tweezers or blowing on it can help the rings distribute themselves more evenly within a template.20
Conclusion
The evolution of quilling from a modest substitute for metal filigree in Renaissance monasteries to a cutting-edge contemporary art form is a testament to the enduring versatility of paper.2 Its current resurgence is fueled by a global community of artists who have adapted traditional coiling techniques to create high-end typography, 3D sculptures, and sustainable luxury products.5 By mastering the foundational geometry of the coil and expanding into advanced architectures like husking and on-edge linework, practitioners can achieve a level of detail that rivals traditional sculpture.23 As the craft continues to integrate with the 2025 trends of “Castlecore” romance and hyper-personalisation, quilling remains a vibrant, evolving medium that beautifully bridges the gap between historical tradition and modern innovation.40
Disclaimer
This article is for informational and educational purposes only. Paper quilling involves the use of sharp objects, including needles, pins, and cutting tools, which can cause injury if handled improperly. Adult supervision is required for all projects involving children. When using chemical adhesives, glazes, or sealants, always work in a well-ventilated area and follow the manufacturer’s safety instructions. Ensure that all materials used around children are certified non-toxic (AP seal). The author and publisher are not responsible for any accidents or injuries resulting from the application of these techniques. 45
Reference
- HISTORY OF THE QUILLING TECHNIQUE – EM ART BLOG, accessed on February 17, 2026, https://www.emart.eu/blog/history-of-the-quilling-technique.html
- The Art of 3D Paper Quilling Techniques | PDF – Scribd, accessed on February 17, 2026, https://www.scribd.com/presentation/161450226/Paper-Quilling
- Getting Start With Quilling : 12 Steps (with Pictures) – Instructables, accessed on February 17, 2026, https://www.instructables.com/Getting-Start-With-Quilling/
- Quilling – The Ancient Papercraft Making A Comeback – PaperPapers, accessed on February 17, 2026, https://www.paperpapers.com/news/quilling-the-ancient-papercraft-making-a-comeback/
- What Is Paper Quilling? An Introduction to the Artful Craft – LindeHobby, accessed on February 17, 2026, https://lindehobby.com/what-is-paper-quilling-1703/
- The History of Quilling – Home School in the Woods Publishing, accessed on February 17, 2026, https://store.homeschoolinthewoods.com/blogs/words-from-the-woods/the-history-of-quilling
- Paper Gold: The History and Art of Paper Quilling – Medium, accessed on February 17, 2026, https://medium.com/@T.C.Williams/paper-gold-the-history-and-art-of-paper-quilling-2935b3253a5d
- My Most Used Quilling Tools – The Papery Craftery, accessed on February 17, 2026, https://www.thepaperycraftery.com/quilling/my-most-used-quilling-tools/
- Quilling 101 – The Sweet Spot, accessed on February 17, 2026, http://www.sweetspotcards.com/2011/12/quilling-101.html
- Art Making Activity: Paper Quilling – The Westmoreland Museum of American Art, accessed on February 17, 2026, https://thewestmoreland.org/blog/art-making-project-paper-quilling/
- Basic Quilling Tools & Supplies : Beginners must read! – The Crafty Angels, accessed on February 17, 2026, https://www.thecraftyangels.com/basic-quilling-tools-supplies-beginners-must-read/
- Best Quilling Tools for beginners – Gathered, accessed on February 17, 2026, https://www.gathered.how/papercraft/best-quilling-tools-for-beginners
- How to Make Your Paper Quilling Water Resistant with Sealant …, accessed on February 17, 2026, https://www.honeysquilling.com/how-to-make-your-paper-quilling-water-resistant-with-sealant/
- Quilling Guide – Tools – Alphe’s Corner, accessed on February 17, 2026, https://alphes-corner.com/2019/01/14/quilling-guide-tools/
- Complete Quilling Handbook – ellidees, accessed on February 17, 2026, https://ellidees.wordpress.com/wp-content/uploads/2014/05/the-complete-quilling-handbook.pdf
- Sealants for Paper Quilling, accessed on February 17, 2026, http://www.honeysquilling.com/sealants-for-paper-quilling/
- Quilling Tools for Beginner and Advanced Quillers – Quilled Creations, accessed on February 17, 2026, https://www.quilledcreations.com/quilling-tools
- The Art of Quilling – Easy Tutorial for Beginners – PaperPapers, accessed on February 17, 2026, https://www.paperpapers.com/news/paper-quilling-for-beginners/
- 10 Quilling Techniques Every Quiller Should Know | Craftsy, accessed on February 17, 2026, https://www.craftsy.com/post/quilling-techniques
- Quilling Circle Templates Boards – How to Use and Common Problems – Paper Zen, accessed on February 17, 2026, https://paperzen.ca/blogs/news/quilling-circle-templates-boards-how-to-use-and-common-problems
- Any advice for a first timer trying their hand at this? No idea what is a good pattern for a beginner. How do y’all get the quill work to adhere to a background paper? Everybody says look stuff up on youtube but I want the skinny from the real world. – Reddit, accessed on February 17, 2026, https://www.reddit.com/r/quilling/comments/1bma97t/any_advice_for_a_first_timer_trying_their_hand_at/
- Paper Quilling Huskings – How to Make Huskings Flowers and …, accessed on February 17, 2026, https://rainbowcabin.com/paper-quilling-huskings-for-flowers-and-designs/
- The Ultimate Paper Quilling Tutorial for Beginners | Craftsy, accessed on February 17, 2026, https://www.craftsy.com/post/paper-quilling-tutorial
- How to Make Paper Teardrops and Other Shapes – The Papery Craftery, accessed on February 17, 2026, https://www.thepaperycraftery.com/quilling/how-to-make-paper-teardrops-and-other-shapes/
- Basic Quilling instructions : Quilled Teardrop Shape – The Crafty Angels, accessed on February 17, 2026, https://www.thecraftyangels.com/basic-quilling-instructions-quilled-teardrop-shape-2/
- Important Basic Quilling Shapes + Heart : 6 Steps – Instructables, accessed on February 17, 2026, https://www.instructables.com/Important-basic-quilling-shapes-heart/
- Quilling 101 – How to Start Paper Quilling – A Free Tutorial – Honey’s Quilling, accessed on February 17, 2026, http://www.honeysquilling.com/quilling-101-how-to-start-paper-quilling-a-free-tutorial/
- The Husking Technique – The Papery Craftery, accessed on February 17, 2026, https://www.thepaperycraftery.com/quilling/the-husking-technique/
- HOW TO DO ON EDGE QUILLING BASICS – PART 1 | PAPER ART TUTORIAL – YouTube, accessed on February 17, 2026, https://www.youtube.com/watch?v=LnX15NWCl7c
- How to Do On-Edge Quilled Lettering and Phrases | All Things Paper, accessed on February 17, 2026, https://www.allthingspaper.net/2021/01/how-to-do-on-edge-quilled-lettering-and.html
- I made an online class for on-edge quilling. Learn the craft as you create your own 3D feather design – Reddit, accessed on February 17, 2026, https://www.reddit.com/r/papercraft/comments/rtpfrj/i_made_an_online_class_for_onedge_quilling_learn/
- Elementary Art Lesson: Quilling | Davis Publications, accessed on February 17, 2026, https://www.davisart.com/schoolarts/issues/2025/process/elementary-art-lesson-quilling/
- Quick Tips for Neater Quilling | Quilling Paper Tips | Quilling for Beginners – YouTube, accessed on February 17, 2026, https://www.youtube.com/watch?v=XWtKeUalxY0
- 7 Common Quilling Mistakes and How to Fix Them – The Papery Craftery, accessed on February 17, 2026, https://www.thepaperycraftery.com/quilling/7-common-quilling-mistakes-and-how-to-fix-them/
- Beautiful Quilling Designs to Inspire You – Wonderful DIY, accessed on February 17, 2026, https://wonderfuldiy.com/quilling-designs-patterns/
- Paper quilling doll tutorial/How to make quilling 3d miniatures – YouTube, accessed on February 17, 2026, https://www.youtube.com/watch?v=LliMRLWBzno
- ALC-1048: The Art of Quilling (3D) – Homeschool in the Woods, accessed on February 17, 2026, https://store.homeschoolinthewoods.com/products/the-art-of-quilling-3d-project
- Quilling on Wedding Invitations – Etsy, accessed on February 17, 2026, https://www.etsy.com/market/quilling_on_wedding_invitations
- 2025 Wedding Stationery Trends: Where Tradition Meets Innovation ❤️ Blog Wezoree, accessed on February 17, 2026, https://wezoree.com/inspiration/wedding-stationery-trends-in-2025/
- 2025 Wedding Stationery Trends – Guja Pusterla, accessed on February 17, 2026, https://gujapusterla.com/wedding-stationery-trends/
- 10 Major Wedding Stationery Trends for 2025 – THEWED, accessed on February 17, 2026, https://thewed.com/magazine/wedding-stationery-trends-for-2025
- The Hottest Wedding Stationery Trends for 2025 | OneFabDay.com, accessed on February 17, 2026, https://onefabday.com/wedding-stationery-trends-2025/
- Wedding Stationery Trends: Stylish Designs for 2025 & Beyond, accessed on February 17, 2026, https://www.rockmywedding.co.uk/wedding-planning/stationery/wedding-stationery-trends
- DIY QUILLED WALL HANGING | Elegant Paper Quilling Art for Home Decor – YouTube, accessed on February 17, 2026, https://www.youtube.com/watch?v=VoMEqvxcG7c
- DIY Papercraft Creators – Top Safety Precautions – PaperPapers, accessed on February 17, 2026, https://www.paperpapers.com/news/top-safety-precautions-for-diy-papercraft-creators/
- Paper quilling for kids: 10 tips – Inna’s Creations, accessed on February 17, 2026, https://increations.blogspot.com/2009/10/paper-quilling-for-children-10-tips.html
- Art Supply Safety for Kids – KinderArt, accessed on February 17, 2026, https://kinderart.com/blog/art-supply-safety-kids/
- Frequently Asked Quilling Questions – All Things Paper, accessed on February 17, 2026, https://www.allthingspaper.net/p/quilling-faq.html