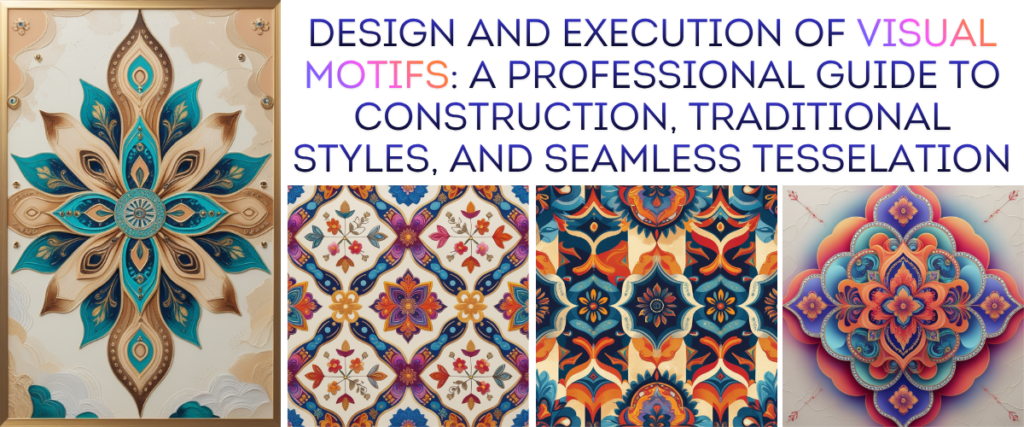
Conceptual Foundations of the Visual Motif
In the lexicon of visual arts and decorative design, a motif represents a fundamental, recurring element of an image that establishes structural harmony, thematic rhythm, and symbolic meaning1. Unlike the main subject of a narrative painting, which typically depicts a singular, non-repeating event, a motif is a discrete design unit engineered for repetition and adaptation2. It can manifest as a simple geometric shape, an abstracted natural form, or a complex figurative illustration2. When deployed systematically across a surface, a motif ceases to be merely an isolated drawing; it organises the surrounding negative space, creating a pattern that guides the viewer’s eye and imbues the medium with structural unity3.
The historical trajectory of motif design highlights its evolution from primitive mark-making to a highly sophisticated visual language5. Archaeological records reveal that prehistoric societies engraved rudimentary geometric motifs on cave walls and stone surfaces to interpret their immediate environments5. Over millennia, these symbols matured into culturally specific iconographies2. For example, the repeating meander and acanthus motifs of classical antiquity established structural order in Greek and Roman architecture2, while intricate floral and geometric motifs in Islamic art provided a meditative, mathematically precise reflection of cosmic harmony3.
In the modern landscape of surface pattern design, fashion, and home decor, the motif remains the essential unit of composition5. Understanding how to construct, refine, and repeat a motif allows the contemporary artist to participate in a rich lineage of visual storytelling, bridging the gap between ancestral traditions and modern industrial production6.
A Taxonomy of Traditional Motif Styles
Traditional motifs across global cultures serve as visual repositories of folklore, spiritual beliefs, and environmental relationships5. Rather than simple decorations, these designs employ structured geometries to convey complex narratives9. The table below provides a comparative analysis of prominent traditional motif styles, detailing their structural foundations, cultural histories, and primary symbolic meanings.
| Motif Style | Historical and Cultural Origin | Core Geometric Foundations | Primary Symbolic Meanings | Distinct Design Elements |
| Paisley (Ambi / Boteh) | Persian and Indian (Kashmiri) textiles11 | Teardrop profile with a dynamically curved, pointed apex11 | Fertility, abundance, eternity, and the continuous flow of life11 | Concentric internal borders, decorative core details, and the vertical Kalka crown ornament11 |
| Lotus (Kamal) | Ancient Egyptian and South Asian sacred art3 | Radial symmetry radiating from a central focal point3 | Spiritual awakening, pristine purity, and divine beauty11 | Open blossoms, closed potential buds, and stylised architectural configurations11 |
| Warli Folk Art | Indigenous Warli Tribe, Maharashtra, India9 | Pure, unperspectival geometry: circles, triangles, and squares7 | The circle of life, natural cycles, and community interdependence15 | Tarpa dance spirals, the Lagna Chauk (marriage enclosure), and Saptarishi constellations9 |
| Gond Art | Pradhan Gond Tribe, Central India17 | Bold macro-outlines filled with delicate micro-patterns17 | Interconnectedness of species, forest mythology, and spiritual protection8 | Lahrdaar (choppy waves), Parsa Paan (betel leaves), Torana (garlands), and Trishul (tridents)17 |
The Symbolism and Geometry of Traditional Styles
Traditional styles demonstrate how geometric abstraction can communicate cultural values10. The teardrop-shaped paisley, known natively as the ambi (mango) in India and the boteh in Persian design, features a curved silhouette that mimics a sprouting seed, representing regeneration and the life force11. This motif often transitions into the kalka, a highly decorated, vertical variation that appeared as a crown ornament, carrying strong royal associations11.
Similarly, the lotus flower (Kamal) is depicted in various structural configurations to represent stages of spiritual progression11. The fully open blossom, composed of radiating, pointed petals, represents enlightenment, while the tightly closed bud signifies unmanifested potential and new beginnings11.
In tribal design systems, such as those of the Warli tribe, geometry acts as a simplified translation of the natural world10. The circle represents the sun and the moon, while the triangle represents mountains and trees10. The square, however, is a human innovation representing sacred land and cultivation10.
In Warli ritual compositions, the central square forms the Chauk or Chaukhat, which is painted to invoke the blessings of deities15. The Lagna Chauk features Palaghata Devi, the goddess of fertility, surrounded by sacred elements like the sun, moon, and a ladder representing agricultural growth15. Adjacent to it, the Dev Chauk houses the five-headed harvest deity, Pachsera Deva, depicted riding a horse to protect the community’s sustenance15.
The famous Tarpa dance motif depicts a spiral of hand-holding dancers winding around a central wind-instrument player, translating the endless circle of life into a dynamic geometric pattern15. Additionally, celestial beliefs are illustrated using the Saptarishi constellation, rendered as seven connected dots9.
Gond art utilises a unique visual grammar where large, flat animal or plant shapes are subdivided and textured using intricate “signature patterns”17. This approach traces back to the myth of the deity Naga Baigin, who covered her body in intricate dot patterns to protect herself20.
Modern Gond artists employ specific repeating fills to serve as their personal signatures and convey narrative meaning17. These include Lahrdaar (choppy waves representing water and dynamic movement), Parsa Paan (betel leaves representing respect and medicinal healing), Torana (graceful semi-circular garland bands composed of alternating triangles), and the Trishul (trident motifs indicating spiritual protection)17.
Furthermore, agricultural life is integrated into these patterns through Sarson ke daane (mustard seed fills), Gehu ke baal (wheat spikes), and Beni (hair braid patterns reflecting daily community aesthetics)17.
The natural world is central to Gond art, particularly represented by sacred trees like the Saja tree (the home of the supreme deity Bada Dev), the Pakri tree (whose medicinal leaves protect the tribe from illness), and the Ganja Mahua tree, which commemorates the folklore of two lovers who fled societal rejection and were reborn as intertwined trees18.
Necessary Materials and Equipment for Motif Design
To draft professional-grade motifs, an artist must assemble a structured toolkit21. The design process progresses systematically from initial measurement to final reproduction21. The table below categorises the essential physical tools, outlining their specific roles in both manual design and relief printing workflows.
| Equipment Category | Essential Tools | Primary Technical Purpose | Practical Design Application |
| Measuring & Drafting Devices | Stainless steel rulers, compasses, soft erasers, and graph paper14 | Establishing precise proportions, concentric curves, and straight guidelines14 | Drafting grid systems and radial guides for symmetrical mandalas and paisley borders14 |
| Marking Instruments | 2B graphite pencils, archival fine-line black markers, and drawing paper21 | Executing initial soft sketches and tracing final high-contrast ink outlines23 | Laying down the base shapes of the motif and refining details for high-resolution scans23 |
| Cutting & Splicing Tools | Precision craft knives (scalpel-style), sharp scissors, and low-tack draft tape22 | Executing clean, straight cuts through paper and securing aligned joints on the reverse side22 | Cutting and rearranging design quadrants during the manual seamless repeat process22 |
| Relief Printing Materials | MasterCut/lino blocks, V-gouge carving tools, and VersaCraft ink pads28 | Carving out negative space and transferring inked motifs onto textiles or paper28 | Block-printing hand-drawn repeating motifs onto fabric, Calico, or stationary28 |
Technical Step-by-Step Guide to Drawing Fundamental Motifs
Creating a compelling motif requires translating complex natural forms into structured, reproducible geometric steps6. The following sub-sections detail the technical execution of three fundamental motif styles: the dot-to-petal mandala, the classical paisley (ambi), and the geometric Warli human figure.
Constructing the Dot-to-Petal Mandala Motif
Mandala motifs rely on radial symmetry, building outward from a single point of origin to establish a balanced, meditative composition3.
- Establish the Grid: Using a ruler and graph paper, draft a straight horizontal line of evenly spaced dots to serve as the alignment anchors14.
- Concentric Mapping: Around each anchor dot, draw a small, tight circle, followed immediately by a larger concentric circle to define the inner core of the motif14.
- Draft the Primary Petals: Sketch uniform flower petal shapes radiating outward from the perimeter of the outer circle, ensuring that the tips of the petals maintain equal distance from the center14.
- Introduce Secondary Fillers: Underneath the intersection of each petal, draw a small circle14. Between each main flower unit, sketch two diverging raindrop shapes—one curving to the left and the other to the right14.
- Construct Connective Flourishes: From the top of each central petal, draw a delicate spiral curl sprouting to the left, followed by a corresponding curl sprouting to the right14.
- Incorporate Linear Containment: Draw a continuous, sweeping wave line below the composition14. Connect the wave to the upper floral elements using fine vertical lines, finishing with a row of small circles beneath the baseline to ground the pattern14.
Drafting the Classical Paisley (Ambi) Motif
The paisley motif combines organic curves with dense internal detailing, making it highly versatile for borders and surface designs11.
- Map the Base Curve: Lightly sketch a circle on the paper. From the lower-left edge of the circle, draw a sweeping, upward S-curve that arches over the top and finishes in a downward-pointing hook to form the curved apex11.
- Define the Silhouette: Draw a secondary, broader curve starting from the lower-right edge of the circle, sweeping upward to meet the apex11. This creates the characteristic teardrop silhouette with a bent tip11.
- Layer the Internal Borders: Inside the outer boundary, draw a parallel inner line to create a narrow decorative border, separating the outer contour from the central core12.
- Infill the Core: Fill the central chamber of the paisley with dense patterns, such as tiny dots (bindu), concentric arcs, or a small stylised lotus flower to create a rich contrast with the empty negative space surrounding the motif12.
Laying Out Warli Tribal Figures
The Warli style uses geometric shapes to convey human movement and social interaction without relying on realistic perspective or proportion7.
- Construct the Torso and Pelvis: Draw an inverted triangle pointing downward to represent the chest and torso of the figure7. Directly below it, draw a right-side-up triangle pointing upward, so that the two vertices meet at a central point7. This vertex alignment forms the waist and symbolises universal balance10.
- Position the Head: Draw a solid circle centred directly above the upper triangle, leaving a small gap for the neck7.
- Draft the Limbs: Draw straight lines extending from the bottom corners of the lower triangle to form the legs, bending them at angles to indicate dancing, walking, or farming postures7. Extend straight lines from the top corners of the upper triangle to form the arms9.
- Establish Context: Arrange a series of these figures in a radiating circle, joining their hand-lines to depict the traditional Tarpa dance, capturing a sense of community unity7.
Mechanical Construction of a Seamless Repeat Tile
To apply a motif across larger surfaces, such as wallpaper, textiles, or gift wrap, the single design must be converted into a seamless repeating tile26. The Swiss Repeat—a classic, manual paper-cutting method—allows the designer to construct a seamless pattern by shifting the borders of the drawing to the centre, making it easy to align the pattern across joints22.
- Initial Draft: Cut a sheet of drawing paper into a perfect square, such as twenty-four by twenty-four centimeters22. Lightly sketch the primary motif directly in the centre of the paper using a graphite pencil22. It is critical to keep the design contained within the centre, ensuring no lines touch or extend over the outer edges of the square22.
- Inking the Core: Once satisfied with the layout, trace over the pencil lines with a high-contrast black marker to ensure clean lines for reproduction22.
- The Vertical Split and Swap: Turn the paper over and draw a vertical line directly down the center27. Carefully cut the paper in half along this line to create left and right halves22. Swap the positions of the two pieces without rotating them, bringing the original outer left and right edges together in the center22. Secure the new joint on the back using low-tack draft tape22.
- The Horizontal Split and Swap: Turn the paper over and draw a horizontal line across the centre of the taped sheet23. Cut the paper in half horizontally along this line22. Swap the top and bottom halves, bringing the original top and bottom edges together in the center22. Tape this seam securely on the back22.
- Infilling the Negative Space: Flipping the paper to the front reveals a blank, cross-shaped space in the centre, formed by the original empty corners and edges of the sheet23. The original drawing is now split across the four outer corners25. Draw new auxiliary elements and connecting flourishes to fill this central blank space, taking care not to sketch over the outer boundaries of the square22.
- Reproduction: Remove the tape and assemble the original pieces to verify the alignments27. This completed composite tile can now be scanned, photocopied, or transferred to a linoleum block for hand-printing25.
Modern Application and Digital Workflow
Transitioning hand-drawn motifs into digital formats allows for rapid colour editing, scaling, and distribution across commercial mediums23. However, rasterising and editing motifs digitally requires a careful approach to preserve image quality and structural consistency32.
Managing Line Consistency in Digital Environments
When assembling a pattern digitally in raster-based programs like Procreate, a common error is duplicating and scaling down a single motif to fill negative space32. Scaling raster layers can lead to image quality loss, producing pixelated lines that stand out against the high-resolution elements of the design32.
Additionally, resizing a rasterised motif alters its stroke width32. If a design features outlines drawn with a specific brush size, scaling down the motif makes those outlines thinner, breaking the visual harmony of the pattern32.
To prevent this, designers should keep stroke widths editable using vector programs like Adobe Illustrator, or draw each motif instance individually at its final scale to preserve a consistent, hand-drawn feel32.
Executing Digital Repeat Patterns
Once a motif is digitised and cleaned, it can be converted into a seamless repeating pattern25:
- Importing the Artwork: Scan the hand-drawn motif at a high resolution—at least three hundred dots per inch—and import the file into vector software25. Use image-tracing tools to convert the raster lines into clean vector paths.
- Generating the Pattern: Select the vector motif and use the pattern-making tools (such as “Object > Pattern > Make” in Adobe Illustrator)34. This action opens a live preview of the repeat grid and adds a pattern swatch to the project34.
- Selecting the Layout: Choose a repeat style that suits the design21. A standard grid repeat works well for flat, geometric designs, while half-drop or brick-by-column layouts offset the motif, creating a more organic, flowing structure that helps conceal the repeating grid21.
- Final Export: Once the spacing and layout are adjusted, save the pattern swatch34. This swatch can be applied to fill any vector shape, making it ready for textile manufacturing, wallpaper printing, or digital distribution25.
Conclusion
Drafting motifs is a foundational design discipline that combines geometric precision with rich visual storytelling3. Whether rendering classical symbols like the paisley and lotus, or practising tribal traditions like Warli and Gond art, the designer uses structure, line, and rhythm to organise space and convey meaning8. By mastering manual construction techniques like the Swiss Repeat and applying professional digital workflows, artists can transform simple, hand-drawn ideas into versatile, seamless repeating patterns for modern surface design22.
Disclaimer
This article is provided for informational and educational purposes only. The drawing techniques, historical interpretations, and software processes described herein represent general artistic practices. Individual results may vary depending on artistic experience, materials used, and specific software versions.
References
- Motif – Tate, https://www.tate.org.uk/art/art-terms/m/motif
- Motif (visual arts) – Wikipedia, https://en.wikipedia.org/wiki/Motif_(visual_arts)
- Understanding Art Motifs and Their Types | PDF | Abstract Art | Heraldry – Scribd, https://www.scribd.com/document/854172245/Note-on-Motif
- In storytelling, the term motif refers to any recurring element – Beemgee, https://www.beemgee.com/blog/motifs/
- A Deep Dive into Motif Design : History, Meaning, Types, Techniques, Examples, and Best Practices with 7 steps – designthinking blog, https://designthinkingblogs.livepositively.com/education-learning/a-deep-dive-into-motif-design-history-meaning-types-techniques-examples-and-best-practices-with-7-steps
- Design and make a pattern motif KS2 | Y3 Art and design | Lesson Resources, https://www.thenational.academy/teachers/programmes/art-primary-ks2/units/perfect-patterns-drawing-and-design/lessons/design-and-make-a-pattern-motif
- Master Warli Art Drawing: Easy Step-by-Step Warli Patterns – Kailasa Kaladhara, https://kailasakaladhara.com/master-warli-art-drawing-easy-step-by-step-warli-patterns/
- Gond Art – Painting Information, Background, Designs & Features – AstaGuru, https://www.astaguru.com/blogs/gond-art—encyclopedic-guide-to-a-timeless-tribal-tradition-263
- Easy Traditional Warli Art: Simple Patterns & Painting Tips – Kailasa Kaladhara, https://kailasakaladhara.com/easy-traditional-warli-art-simple-patterns/
- Motifs and Math: Geometric Shapes in Warli Art – MeMeraki, https://www.memeraki.com/blogs/posts/motifs-and-math-geometric-shapes-in-warli-art
- Traditional Indian Motifs Decoded: Paisley, Lotus, Peacock & More – Rashika Mittal, https://rashikamittal.com/blogs/journal/traditional-indian-motifs-guide-paisley-lotus-peacock
- Traditional Paisley Motifs Illustrations & Vectors – Dreamstime.com, https://www.dreamstime.com/illustration/traditional-paisley-motifs.html
- How to Draw and Paint Indian Folk Inspired Lotus Flower Motif Watercolor Timelapse tutorial. – YouTube, https://www.youtube.com/watch?v=XiSlPkrGT04
- How to Make a Pattern: Learn How to Draw Patterns Step by Step – Art is Fun, https://www.art-is-fun.com/how-to-make-a-pattern
- WARLI PAINTINGS, DIFFERENT TYPES & STYLES – MeMeraki, https://www.memeraki.com/blogs/posts/warli-paintings-different-types-styles
- Warli Art: A Complete Guide to India’s Ancient Tribal Painting | Aza Editorials, https://www.azafashions.com/blog/warli-art-a-complete-guide-to-indias-ancient-tribal-painting/
- Signature Patterns in Gond Art: Meaning, Symbolism & Style – MeMeraki, https://www.memeraki.com/blogs/posts/signature-patterns-in-gond
- Gond Art: History, Elements and Stories – MeMeraki, https://www.memeraki.com/blogs/posts/gond-art-residing-in-the-heart-of-india
- Gond Art Painting | History, Techniques & Modern Impact – Creativity Art Gallery, https://www.creativityartgallery.org/gond-art-painting-history-techniques-modern-importance/
- Signature Patterns in Gond Art – MeMeraki, https://www.memeraki.com/blogs/posts/signature-patterns-in-gond-art
- Section: UNIT 3 :MOTIF AND PATTERN DESIGN PROCESS – REB, https://elearning.reb.rw/course/section.php?id=7170
- How to Create a Pattern Repeat by Hand, https://patternanddesign.com/how-to-create-a-pattern-repeat-by-hand/
- Repeat Pattern Workshop, https://norwichuni.ac.uk/app/uploads/2022/03/nua_repeat-pattern_worksheet.pdf
- How to Draw a Motif Design | Very Easy (Design Idea 03) – YouTube, https://www.youtube.com/watch?v=N-ocWZtj1hs
- Tutorial: Creating a Seamless Repeat from a Drawing – Spoonflower Help Center, https://support.spoonflower.com/hc/en-us/articles/38504698535437-Tutorial-Creating-a-Seamless-Repeat-from-a-Drawing
- 5 Steps to Illustrating a Repeat Pattern by Hand | Skillshare Blog, https://www.skillshare.com/en/blog/5-steps-to-illustrating-a-repeat-pattern-by-hand/
- Repeat Pattern Repeat – Ceramic Arts Network, https://ceramicartsnetwork.org/pottery-making-illustrated/pottery-making-illustrated-article/Repeat-Pattern-Repeat
- How to Design and Print a Half Drop Repeating Pattern – Handprinted, https://handprinted.co.uk/blogs/blog/how-to-design-and-print-a-half-drop-repeating-pattern-1
- How to draw beautiful motif designs by drawingartificer on DeviantArt, https://www.deviantart.com/drawingartificer/art/How-to-draw-beautiful-motif-designs-964738722
- I’m absolutely obsessed with seamless repeating patterns for surface design ‘stuff’ 🙂 Here are loads of methods., https://howtodotechystuff.wordpress.com/2025/02/16/im-absolutely-obsessed-with-seamless-repeating-patterns-for-surface-design-stuff-here-are-loads-of-methods/
- Making a repeat pattern by hand – YouTube, https://www.youtube.com/shorts/jVDsVm8TG3w
- Drawing Better Motifs for your Surface Pattern Designs – Rebecca Flaherty, https://rebeccaflaherty.com/drawing-better-motifs-for-your-surface-pattern-designs/
- Tips for better motifs in your surface pattern designs in Procreate – YouTube, https://www.youtube.com/watch?v=HecGWaCxvsk
- Drawing ETHNIC motifs & creating a seamless repeat pattern from it on Adobe Illustrator, https://www.youtube.com/watch?v=3TBslQ3y12I